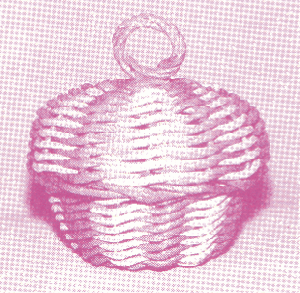
Mini Basket
With wire rush a variety of delightful small baskets can be made. In the following instructions we will present a small basket that can be made with a handle as one option or a lid as the second option.
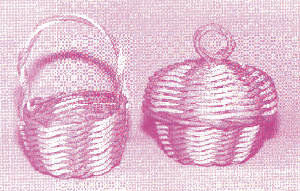
These instructions are presented in two colors, described as A and B. If you wish, the basket can be made with one color.
DEFINITIONS AND TECHNIQUES
We are using some common terms to describe the weaving techniques. As in all crafts they will frequently take on special meanings. Here are the definitions as used in basketry.
SPOKE – The spokes are essentially the vertical elements of the basket. They will have a radial distribution in the base.
WEAVER – The weavers are the horizontal elements of the basket. They are the stuff from which the basket is woven.
BASE – This is the bottom part of the basket.
BORDER – This is the top of the basket. It is woven from the spokes. To weave the border, take a spoke and bring it behind the first spoke to the right and in front of the second spoke to the right, then to the inside behind the third spoke to the right. Continue with the same process with each spoke around the basket.
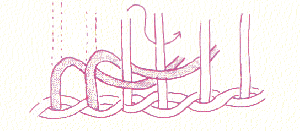
When you reach the last two spokes, continue by interweaving as shown.
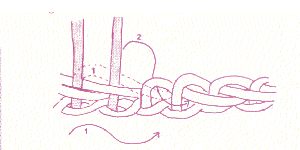
You will now have a continuous ‘braid” for the rim.
TWINING – This is the weave used for the baskets. it is a simple weave with two elements. Alternately weave one weaver behind the spoke to the front, then weave the other weaver beh i nd the next spoke to the front. See the iIIustration. A picture is worth a thousand words.

SPLICING – To splice the ends of your weavers, simply end to the inside of the basket and lay the end of the new weaver on top of the old weaver. Allow about 1/2 inch overlap. Continue your weaving. See the illustration.

THE BASIC BASKET
Requires 16 feet of color A and 7 feet of color B, 23 feet of wire rush total.
Cutting Instructions:
Cut from color A
SPOKES –
6 pieces, 1 foot long
WEAVERS-
1 piece, 6 feet long
1 piece, 4 feet long
Cut from color B
WEAVERS –
1 piece, 7 feet long
Weaving Instructions:
BASE – With the six 1 foot spokes, form a straight cross base 3 x 3. Take the 6 foot weaver of color A and fold it at 18 inches and twine around the base twice with the spokes in groups of three. Divide the spokes into singles and twine for two more rows.
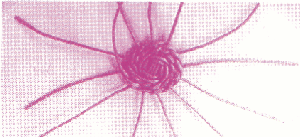
SIDES – Splice in the 7 foot weaver of color B, turn up the spokes and twine for nine rows.
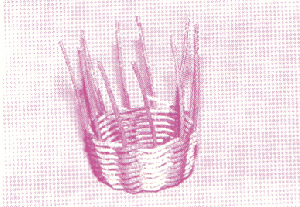
BORDER – The border is a basic trac border, behind one, in front of one and to the inside all around the basket. You now have a finished basket.
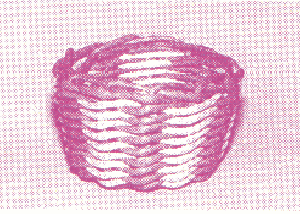
You can now, if you wish, add either a handle or a lid.
HANDLE OPTION
Requires 3 feet of material.
Cut two pieces, 18 inches long. One of color A and one of color B.
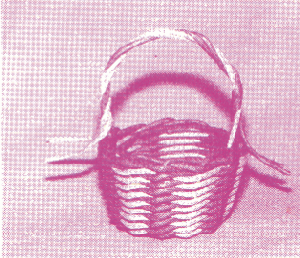
Fold in half and insert through the side of the basket, just under the rim, so that each half goes on opposite sides of a spoke. Repeat on the opposite side. Twist the two han- dle pieces around each other to form the handle and bring the loose ends in to the basket again on opposite sides of the spoke, twist to secure.
LID OPTION
Requires 18 feet of color A and 8 feet of color B, 26 feet total.
Making a lid is like making another basket designed to fit over the top of the first one.
Cutting Instructions:
Cut from color A
SPOKES –
6 pieces, 1foot long
WEAVER –
1 piece, 3 feet long
1 piece, 8 feet long
ORNAMENT-
1 piece, 1foot long
Cut from color B
WEAVERS –
1piece, 8 feet long
Weaving Instructions:
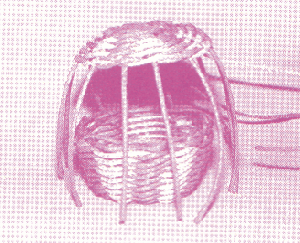
Start as with the basket only fold the 3 foot weaver at 14 inches. Twine around on three spokes twice and then divide the spokes into singles and twine around once. Splice in color B and continue twining, adding the additional weaver of A when needed. Gently slope the shape of the lid to conform to the shape of the basket and continue twining for nine rows of two colors. The border is a simple trac border of in front of one and to the inside all the way around.
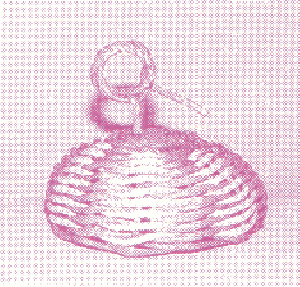
For the top ornament, take a piece 1foot long and twist it around its self three times, insert the end through the top of the basket and twist to secure.
